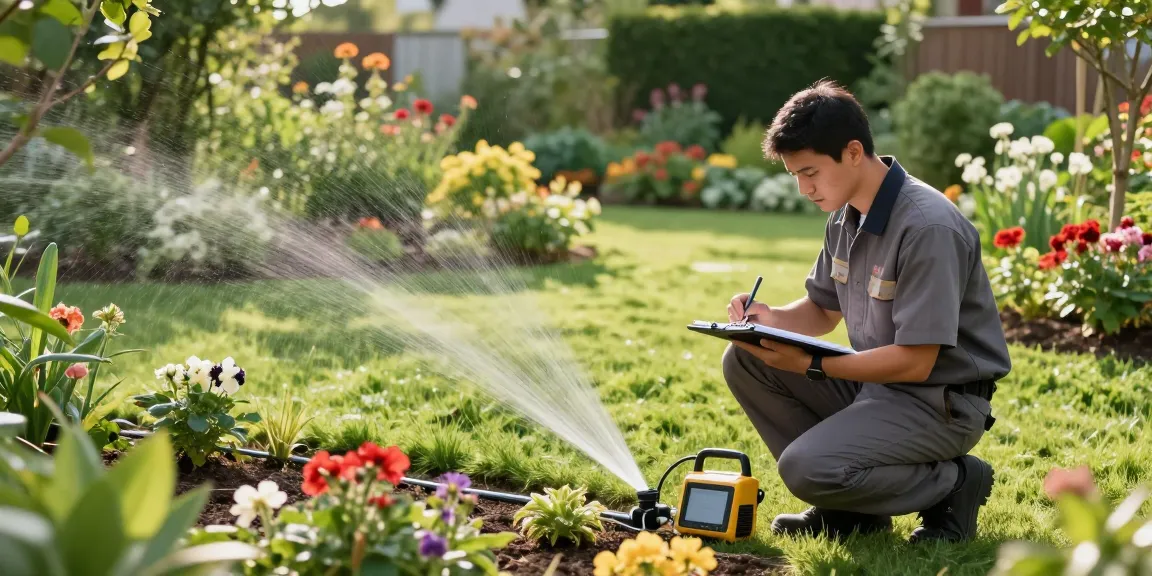
When Jenna noticed brown rings forming on the edge of her suburban front lawn each July, she assumed drought and cranked the sprinkler timer longer. Her water bill told a different story: wasted cycles and soggy spots under the maple tree. After swapping to a targeted setup and a WiFi controller, she cut weekly runtime by 30% and fixed the dry ring without overwatering the rest of the yard. This guide shows how to match the right smart irrigation setup to common yard problems so you save water and money, like Jenna did.
1. Identify the watering challenge, then pick the right smart setup
Start by diagnosing what’s actually wrong: is water pooling, are some beds dry while others are soggy, or are potted plants dying faster than in-ground beds? Each problem needs a different solution. Below are typical challenges and the RainPoint-aligned setups that solve them.
Common problems and matched setups
- Patchy lawn or uneven coverage —> Smart in-ground sprinklers with zone-specific control. A WiFi sprinkler timer lets you set different schedules and runtimes per zone.
- Vegetable beds drying out between waterings —> Drip irrigation kit with pressure compensation and emitters near root crowns for steady delivery.
- Flower beds getting leaf wet or stressed —> Soaker hoses or drip tubing buried under mulch for root-zone watering only.
- Potted plants or window boxes —> Self-watering wicks or small reservoir drip lines that release slowly over hours.
- Small, temporary lawn or new sod —> Mobile DIY sprinklers (soaker hose or oscillating on a timer) that you can move as plants establish.
For larger lawns that need precise scheduling and weather-based adjustments, a WiFi timer such as the RainPoint model lets you automate changes by season or precip forecast. If you need a toolbox solution for raised beds and containers, a complete drip kit covers emitters, tubing, and fittings without overwatering fragile plants.
2. Install zone-based watering and set efficient schedules
Zone-based watering is the backbone of water savings. Instead of treating the yard as one big area, break it into irrigation zones by plant type, sun exposure, and soil. That way, shady areas run less often and vegetable beds get slow, deep water when they need it.
How to create sensible zones
- Map your yard: Draw basic zones—lawn, vegetable patch, flower beds, trees, containers.
- Group by water needs: Turf together, edibles together, and ornamentals together if possible.
- Account for slope and soil: Sandy areas need more frequent watering than clay.
Set schedules with shorter, more frequent cycles for sandy soil or new plantings, and longer, less frequent runs for established turf and deep-rooted beds. According to the EPA’s WaterSense program, smart irrigation controllers can save homeowners about 8%–15% on their outdoor water use; in some cases savings reach thousands of gallons per year depending on lawn size and climate (EPA, WaterSense). You can design a weekly plan like the one below for a temperate lawn and mixed beds:
ZoneFrequencyDurationSun lawn (established)2–3x/week20–30 minutes per run (split cycles)Vegetable beds3–5x/week30–60 minutes at low flow (drip)Flower beds2–3x/week30–45 minutes (soaker/drip)ContainersDaily–every other day10–30 minutes (self-watering/drip)
Use short “cycle-and-soak” sessions for slopes to prevent runoff: break one long run into two or three segments spaced 30–60 minutes apart. A smart controller automates that pattern so you don’t have to remember it.
3. Reduce waste with sensors, weather data, and drip systems
Two big water wasters are watering when it’s raining and watering too much too often. Sensors and weather-aware controllers cut both problems. Soil moisture sensors stop cycles when root zones are already wet; rain sensors suspend the system during storms. A WiFi-enabled timer can also pull local forecast data and reduce runtimes automatically.
Drip irrigation for precision
For beds and vegetables, drip irrigation delivers water directly to the root zone and can reduce water use by 30–70% compared with spray irrigation in some settings. For example, a homeowner in California reported using a full drip kit to replace a 3-zone spray system and reduced garden water use by nearly half in summer. Pair a drip kit with a smart timer that runs shorter daily pulses for edibles so soil remains consistently moist without saturation.
If you want to explore ready-made options matched to your yard, check RainPoint’s product lines— smart irrigation systems save water and money —and find kits and controllers sized for small beds up to large landscapes.
4. Practical installation steps and maintenance that keep savings real
Installing a water-efficient system is one thing; maintaining it keeps the savings flowing. Below are step-by-step actions for common setups with clear examples.
Simple installation checklist
- Plan zones and flow: Measure your water source’s flow rate with a bucket test (gallons per minute) so you don’t overload a single zone.
- Install the controller: Mount the WiFi timer near the spigot or electrical source; connect zones to valves per manufacturer instructions.
- Lay tubing or pipe: For drip, run mainline tubing and add emitters at each plant. For sprinklers, place heads evenly and avoid watering pavement.
- Add sensors: Place soil moisture sensors at root depth in representative zones and connect rain sensor if available.
- Program smart schedules: Use weather-based or custom schedules—shorter in spring/fall, more in peak summer. Test and adjust after a week.
Maintenance tips: Check filters and emitters monthly, flush lines before winter, and recalibrate runtimes seasonally. A simple example: switch a lawn zone from 30 minutes every other day in July to 20 minutes three times a week in September when temperatures drop. That small change can save hundreds of gallons over a season.
A WiFi timer from RainPoint can handle seasonal programming and let you change settings from your phone while you’re away, helping ensure the system operates efficiently without constant tinkering.
5. Measure savings and tweak for best performance
After installation, quantify results so you can tweak for better performance. Read your water meter before and after a scheduled irrigation period and compare weekly totals. Many homeowners see payback in reduced bills and healthier plants within one season.
Concrete tracking example: if your household used 30,000 gallons on average outdoors per year and you implement zoning, drip for beds, and a weather-based controller, a conservative 15% reduction (EPA WaterSense estimate) equals 4,500 gallons saved—roughly one to two months’ worth of outdoor watering for a typical suburban lawn. Larger properties or inefficient old systems can save far more.
Look for signs your setup needs tweaking: puddles indicate runoff or too-high flow; yellowing turf at the root suggests irregular watering or poor distribution; wet mulch on top but dry below points to shallow watering. Fix these by shortening single runs, increasing soak intervals, or switching to emitters that place water deeper in the root zone.
With the right match between problem and system—mobile sprinklers for small lawns, smart in-ground systems for larger properties, drip for vegetables, soaker/drip for flower beds, and self-watering for pots—you’ll both conserve water and cut costs while keeping plants healthy. Start small, measure, and let the system learn your yard.